Did you know that over 60% of people who start a low-carb lifestyle end up quitting just because they miss regular sandwiches? I can completely relate to that! When I first changed my eating habits, losing my morning pocket bread was definitely the hardest part.
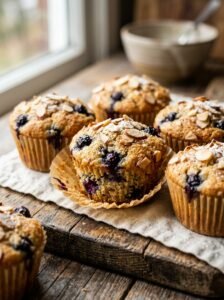
I spent weeks trying to create the perfect keto breakfast pita with almond flour. My early attempts were made by me using just eggs and cheese, but they were always so floppy and weird. I really wanted genuine low carb bread that could actually hold a hearty meal without falling apart in my hands.
It took a bunch of messy, terrible mistakes before I finally figured out the right trick in the kitchen. But let me tell ya, cracking the code on this gluten free pita was a huge triumph. Now, this easy keto breakfast pita with almond flour is baked by me every single weekend for my meal prep.
You are going to love how simple this actually is. Just stick with me, and I’ll show you exactly how to get that perfect, fluffy pocket without all the carbs.

Essential Ingredients for Your Low-Carb Pita Bread
Let me tell ya, figuring out the right stuff for a keto breakfast pita with almond flour almost broke my spirit. I probably wasted like, three whole bags of expensive nuts trying to make this work in my kitchen. My first few batches tasted like actual cardboard, which was super frustrating. I remember literally crying over the stove one morning because I just wanted a decent sandwich for once. But man, when I finally nailed it, it was pure triumph.
Picking the Right Base
So here is the deal with the flour. You absolutely need blanched almond flour, not almond meal. Almond meal has the skins still on it, which makes the dough super gritty and weird. When you are making a keto breakfast pita with almond flour, that fine texture is basically the secret sauce for a soft pocket. I learned that the hard way after feeding my husband a very crunchy, very awful egg wrap. The flour is sifted by me twice just to make it perfect.
The Magic Glue
Now we gotta talk about what holds this whole thing together. Gluten is usually what makes regular bread stretchy, right? Well, since we don’t have that, we need psyllium husk powder. Don’t use the whole husks, or your pita will look like it has little bugs in it. Trust me on that one, it’s gross. The powder acts like magic glue, soaking up the water and making the dough actually rollable without falling to pieces. I tried a xanthan gum substitute once instead, but it just made everything super gummy. Stick to the psyllium husk powder for the best gluten free baking experience.
Making It Puff
Okay, so how do we get that classic pocket shape? You need fresh baking powder. If your baking powder has been sitting in the pantry since 2024, throw it out right now! You need the active stuff so the low carb dough puffs up in the hot oven. I use exactly two teaspoons for a batch of four pitas. It creates this awesome little steam pocket inside while it is being baked by the oven.
The Secret Touch
Lastly, do not forget the salt. Low carb living means we need to keep our electrolytes up anyway. I use half a teaspoon of fine sea salt. If you use coarse salt, it won’t mix right and you will get salty lumps. Honestly, making a keto breakfast pita with almond flour is easier than it looks once you have the right stuff. Just grab these ingredients and you are ready to roll.
Water Temperature Matters
There is lots of things to remember, but water temperature is huge. You gotta use boiling hot water, not just warm. The hot water activates the psyllium husk so it swells up perfectly. My first time, I just used tap water and it turned into a soupy mess. I was so mad I almost threw the bowl across the room. So boil that water first, okay?

Step-by-Step Guide to Baking Almond Flour Pita
Getting the dough right is super important. I used to make such a big mess when I started baking low carb breads. My kitchen looked like a flour bomb went off! But over time, I figured out a system that keeps things clean and makes a perfect keto breakfast pita with almond flour every single time.
Mixing the Wet and Dry Stuff
First, you need a big mixing bowl. I like my heavy glass one. You put your blanched almond flour, baking powder, psyllium husk powder, and salt in there. Give it a really good stir with a whisk. You want all the dry ingredients mixed up nice and even. Then, pour your boiling hot water and a splash of olive oil right into the middle of the bowl. Stir it quick with a wooden spoon. The dough is gonna look weird and clumpy at first, but keep stirring. It comes together in about a minute. I always let it sit for ten minutes after that. This gives the psyllium husk time to soak up all the water and get firm.
Rolling Out the Dough
Here is my absolute best trick. Do not try to roll this dough on a bare counter. It will stick to everything and you will be so mad. You have to use parchment paper. I tear off two big pieces. Put a ball of dough on the bottom piece, then put the other piece on top. Then you just use your rolling pin and press it out flat. I usually make my pitas about a quarter-inch thick. If you roll them too thin, they rip. If they are too thick, they don’t puff up into a pocket. Peeling off the top paper carefully is done by me so it doesn’t tear the sticky dough.
Baking to Perfection
You need your oven nice and hot. I set mine to 350 degrees Fahrenheit. If your oven ain’t hot enough, the bread won’t rise right. I slide the parchment paper with the raw pitas right onto a flat baking sheet. Put them in the oven for exactly 15 minutes. Watch them close around the 12-minute mark, because every oven cooks a little different. They should get this beautiful golden brown color on the edges.
Cooling it Down
When they are done, take them out and let them cool on a wire rack. Do not cut them open right away! I know it is tempting because they smell amazing. But if you cut them while they are still super hot, the steam escapes and the inside gets super gummy. Wait at least ten minutes before you slice your keto flatbread open to stuff it. Your patience will give you the best fluffy texture for your morning meal.

Best Keto Breakfast Fillings for Your Pita
Now that you baked the perfect pocket, we gotta talk about what goes inside. I once tried stuffing a whole runny fried egg in there, and the hot yolk exploded down my favorite shirt before I even got to my classroom! Over time, I finally figured out what actually works for a solid ketogenic breakfast without making a huge mess of yourself.
The Classic Egg and Feta
My absolute favorite go-to is taking two eggs and mixing them up with some fresh spinach and salty feta cheese. The eggs are scrambled by me in a really generous scoop of butter so they stay super soft and fluffy. Stuffing this rich mixture into a warm keto breakfast pita with almond flour is pure heaven, I’m telling ya.
Bacon and Avocado Dream
If you want something a little more crunchy, you gotta try my thick-cut bacon and smashed avocado combo. Sometimes I forget the pan is on and the bacon turns into literal charcoal, which is super frustrating when you are hungry! But when you get it nice and crispy, it makes for one of the absolute best keto sandwich ideas.
Hearty Sausage and Cheddar
For those grumpy mornings when you are just starving, a big pork sausage patty is definitely the way to go. The cheese is melted by the hot sausage if you put a slice of cheddar right on top immediately after cooking. I always grab sharp cheddar because it gives the most amazing flavor for high fat breakfast meals like this.
The Sweet Morning Option
Who says you only have to eat savory stuff for your morning meal? I was craving pancakes one day and just threw some sugar-free maple syrup and cream cheese right into my bread pocket. It sounded totally weird at first, but it was actually a delicious and super quick keto breakfast!
Keep It Simple and Dry
Listen, you don’t got to be a fancy chef to make your morning meals taste good. Sometimes I literally just spread some soft butter and a heavy sprinkle of everything bagel seasoning inside mine. I always recommend making a keto breakfast pita with almond flour for meal prep, but just remember not to overstuff them or the bottoms will blow out!

Storing and Reheating Your Keto Pita Bread
Let me tell you, keeping these things fresh was a whole new headache I didn’t see coming. I remember my very first successful batch of keto breakfast pita with almond flour; I was so proud. I just left them sitting on the counter in a regular plastic bag like normal bread. Two days later? They were completely covered in these gross green fuzzy spots. I was so mad I had to throw away all my hard work!
The Fridge is Your Friend
Because there aren’t any weird chemical preservatives in this recipe, they go bad super fast at room temperature. You absolutely have to keep them cold. Once your pitas are completely cooled down, wrap them tight in plastic wrap. Then put them in an airtight container in the fridge. They will stay perfectly fresh for about five days this way. Just make sure they are totally cool first, otherwise the condensation makes them super soggy and gross.
Freezing for Later
If you are doing a big meal prep for the month, freezing is the way to go. I actually prefer making a huge double batch of keto breakfast pita with almond flour on Sunday afternoons. To freeze them right, you gotta put a small square of parchment paper between each pita. If you skip this step, they will freeze together into one giant, unbreakable almond flour rock. Put the stack into a heavy-duty freezer bag and squeeze all the air out. They keep great in the freezer for up to three months.
Bringing Them Back to Life
Reheating them is where the magic happens. Don’t use the microwave, it makes the keto dough weirdly chewy and tough. The best way is the toaster. Just pop a cold pita right into the toaster on a medium setting. It crisps up the outside edges beautifully while keeping the inside nice and soft.
The Skillet Method
If you are already cooking eggs, you can just use your skillet. I wipe a little butter in the hot pan and toast the pita for about thirty seconds on each side. It smells amazing and gets this perfect golden crust. Honestly, once you figure out how to store and reheat them, having a keto breakfast pita with almond flour ready to go makes mornings so much easier.

So we finally made it to the end of our baking journey, and you now know everything about making a keto breakfast pita with almond flour. You learned all about grabbing the right blanched flour, mixing that sticky dough, and getting it to puff up in the oven. It really is the perfect low carb bread for your morning routine.
I remember how hopeless I felt when I started my ketogenic lifestyle and thought I’d never eat a sandwich again. It was super depressing, honestly. But mastering this almond flour dough changed everything for me. It is eaten by me almost every single morning now, and it keeps me full until lunch.
Don’t beat yourself up if your first batch is a total flop. My first few tries were complete garbage and went straight into the trash can. I actually burned a pan so bad once that I had to throw the whole thing away! Just keep trying, because having a solid keto friendly breakfast makes sticking to your goals way easier.
You don’t need to be a fancy baker to pull off this gluten free baking magic. Remembering to use boiling hot water and letting the psyllium husk sit is half the battle. The other half is just having the patience to let it cool before you slice it open.
Your healthy breakfast ideas are going to be completely transformed by this little pocket. I still catch myself smiling when I pull a fresh batch out of the oven. It is just so satisfying to make something from scratch that actually tastes like real food. Plus, knowing exactly what ingredients are going into my body gives me peace of mind.
It’s a huge win for any lchf lifestyle, and I am so glad I stuck with it. If you are planning to make these for your family, maybe double the recipe. My husband always steals mine before I even get a chance to sit down and eat! They disappear fast when they are fresh and warm out of the oven.
Having a stash in the freezer is a total lifesaver on busy weekdays when you are rushing out the door. If this guide helped you figure out your morning routine, I would love it if you shared it. Please pin this recipe on Pinterest so you can easily find it next time you do your keto meal prep.
It helps my blog out a ton and shares the low carb living love with others. I really hope you enjoy making these as much as I do. Let me know in the comments what awesome fillings you decided to stuff inside your pocket!