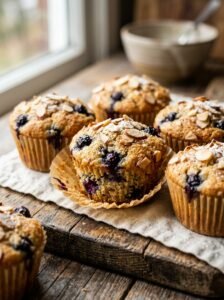
I gotta admit, giving up my morning crunch was the hardest part about starting this whole low-carb thing. I used to look forward to a crispy taco on the way to work, and just eating eggs from a bowl got boring fast. That’s when I started experimenting and found these Keto breakfast tacos with cheese shells. Seriously, it changes the game. The cheese gets fried and salty, and it actually holds the bacon and eggs without falling apart like those weird almond flour wraps always do. If you miss that snap when you take a bite, you are gonna love this recipe, it is super easy and honestly tastes better than the corn ones anyway.
 1")
Why Cheese Shells Are the Holy Grail of Low-Carb Cooking
You know, when I first looked at the “low carb” section in the grocery store, I got excited. I bought those expensive tortillas that claimed to have only 4 net carbs. But when I got them home? They tasted like wet cardboard. Plus, my blood sugar didn’t seem to like them very much either.
That is why these cheese shells are basically a miracle for us. First off, the carb count is pretty much zero. It’s just cheese! You aren’t guessing about hidden ingredients or weird fibers that bloat you up.
Then there is the texture. If you have been doing keto for a while, you know that missing “crunch” is a real thing. Eggs are soft, bacon is crispy but small, and avocado is mushy. When you bite into a fried cheese shell, you get that loud snap that makes it feel like you are eating actual junk food, even though you aren’t.
Also, think about the fuel. Since we run on fat now, a shell made of cheddar is going to keep you full way longer than a fiber-filled wrap. I can eat two of these tacos at 7 AM and I’m not even looking at the clock for a snack until way past noon. And the best part? It’s literally one ingredient. You don’t need to mix almond flour or worry about xanthan gum. You just need a bag of cheese.
 2")
Essential Ingredients for the Perfect Keto Breakfast Tacos
You might think you can just grab whatever is in the fridge, but trust me, picking the right stuff makes a huge difference here. I learned this the hard way after a few failed attempts that turned into a greasy mess.
First, let’s talk about the cheese. This is the most important part since it is your shell. Do not buy the pre-shredded bags! They put potato starch on that cheese to keep it from clumping, and that starch burns and messes up the crispiness. I always buy a block of mild or medium cheddar and grate it myself. Sharp cheddar is tasty, but I find the milder ones melt a bit more evenly for the shell.
For the filling, I usually stick to eggs and bacon. I like to cook my bacon until it is super crunchy to match the shell. For the eggs, I scramble them with a little heavy cream to keep them fluffy. If you use sausage, just check the label for hidden sugar or maple syrup.
Finally, you need something fresh. Since the shell is basically pure fat and salt, you want something to cut through that richness. I always chop up some fresh cilantro and squeeze a little lime juice on top. A spoonful of pico de gallo works wonders too. Don’t forget a little cumin or chili powder in your eggs for flavor—it really wakes you up!
 3")
Step-by-Step Guide: How to Make Crispy Cheese Shells
Now for the fun part. Making the shells is actually pretty easy once you get the hang of it, but I burned a few before I figured out the right timing. You can do this in a skillet or in the oven, depending on how many you need to make.
If you are just making one or two for yourself, the skillet is the way to go. I grab my non-stick pan and put it on medium-low heat. You don’t want it too hot, or the cheese will burn before it gets crispy. I drop a handful of that shredded cheddar right in the center and spread it out into a circle. Then, I just watch it. It will bubble like crazy and release a lot of oil. That is normal! When the edges start getting dark golden brown and the middle looks lacy, it is time to take it off.
If you are feeding the whole family, do not stand there making one at a time. Turn your oven to 400°F (that’s about 200°C). Line a baking sheet with parchment paper—make sure it is parchment and not wax paper, or you will have a smoky kitchen. Make piles of cheese on the paper, leaving space between them because they spread out. Bake them for about 5 to 7 minutes until they look golden.
Here is the trickiest part: the shaping. You have to move fast but be careful because hot cheese oil really hurts. Let the cheese cool for just a second so it holds together, then lift it with a spatula. I drape mine over the handle of a wooden spoon that I balanced between two cups. It hangs down and makes that taco shape. You have to let it sit there until it is totally cool and hard. If you touch it too soon, it will just collapse. Patience is key here!
 4")
Delicious Filling Variations to Switch Up Your Morning
Let’s be real, even with a crunchy cheese shell, eating plain bacon and eggs every single day can get a little boring. That is usually when I fall off the wagon and eat a donut. So, I started mixing things up to keep it interesting. You can really put almost anything in these, as long as it’s low carb.
My absolute favorite switch is using Chorizo. If you haven’t tried Mexican chorizo, it is this spicy, crumbly pork sausage that releases a ton of red oil when you cook it. It is messy, but man is it good. I fry that up and scramble the eggs right in the orange grease. It adds so much flavor you don’t even need salsa. Just be sure to check the nutrition label, some brands sneak in sugar.
When I want something that feels a bit lighter, I do what I call the “Cali-Keto.” I use turkey bacon instead of regular (it’s crispier than you think if you cook it right) and I load up on the guacamole. I mean a lot of guacamole. The cool, creamy avocado tastes amazing against the hot, salty cheese shell. Sometimes I add a dollop of sour cream too.
If we had steak for dinner the night before, you better believe I’m making steak and eggs in the morning. I slice the cold leftover steak into thin strips and toss them in the pan just long enough to warm up. It makes for a really hearty breakfast that keeps me full for hours.
And hey, if you are trying to get more veggies in, you don’t have to stick to meat. I like sautéing mushrooms and spinach with a little garlic. The spinach wilts down to almost nothing, so you can pack a lot of greens in there. Just make sure you cook the water out of the veggies first, or they will make your crispy shell get soggy.
 5")
Troubleshooting Common Cheese Shell Mistakes
I have to be honest, I ruined a whole block of cheese when I first started trying this. It looked so easy on Instagram, but my kitchen was a disaster. Here are the things that usually go wrong and how I fixed them so you don’t have to waste your groceries.
First, let’s talk about the “Grease Puddle.” Sometimes, especially if I buy the store brand cheddar, the cheese separates into a rubbery lump and a big pool of oil. It looks pretty gross. If this happens, don’t panic. I just take a paper towel and gently dab the oil off the cheese while it is still in the pan. It actually crisps up better without that extra grease sitting on it anyway.
Then there is the burning issue. There is a really small window between “perfectly golden” and “burnt and bitter.” If your heat is turned up too high, the edges will turn black before the middle is even cooked. I learned to keep the heat on medium-low. It takes a minute longer, but it saves the taco. If it starts smelling like burnt popcorn, it’s probably too late.
Another annoying thing is when the shell stays soft. You want a crunchy taco, not a floppy piece of cheese. This usually means you took it off the heat too early. You have to wait until you see those little holes, kind of like lace, all over the cheese. If it still looks like a solid puddle, let it cook. Also, humidity can mess with it; on rainy days, mine are never quite as crisp.
Finally, sticking. Oh my gosh, scrubbing burnt cheese off a pan is the worst chore ever. If you don’t have a really good non-stick skillet, do not even try this on the stove. Just use the oven method with parchment paper. And please make sure it is parchment paper! I used wax paper once and the smoke alarm went off for twenty minutes. Learn from my mistakes!
 6")
Making Keto breakfast tacos with cheese shells has honestly changed my whole outlook on low-carb eating. It’s not just about finding a replacement for bread; it’s about finding something that actually tastes better and makes you feel good. These tacos are crunchy, savory, and they keep me full until lunch without that weird mid-morning energy crash. I really think the best part is how much my family likes them—half the time they don’t even realize they are eating “diet” food.
If you give these a try, don’t be afraid to experiment with different cheeses or leftovers from your fridge. You really can’t mess it up too bad as long as you watch the heat on that pan! If you found this helpful or if your tacos turned out amazing, please save this to your “Keto Breakfast Ideas” board on Pinterest so you can find it later and share the love with others looking for a great morning meal. Happy cooking!